
Intro
Choosing a child’s first or next bicycle can feel more complicated than expected. Age provides a useful starting point, but height, inseam length, motor coordination, confidence, and the bicycle’s adjustability all influence whether a child can ride safely and comfortably.
The wheel-size ranges below are approximate. Children of the same age may need different bicycles, and manufacturers do not use perfectly identical geometry. Whenever possible, measure the child, compare the manufacturer’s chart, and have the child sit on and test the bicycle before purchasing.
Highlights
Wheel size is the main sizing category, but height and inseam provide a more individualized fit.
A bicycle that is slightly too large can be difficult to control; a modestly smaller, adjustable model is often easier to learn on.
A child should be able to stop, put down at least the balls of both feet when appropriate, and reach the controls without stretching.
Helmet use, supervision, traffic awareness, and a safe riding environment are as important as bicycle size.
Age ranges are estimates rather than developmental requirements; readiness and confidence matter.
Why age and height are only starting points
Children’s bicycles are usually classified by wheel diameter rather than frame size. Common categories include balance bikes, 12-, 14-, 16-, 18-, 20-, 24-, and 26-inch bicycles. Age and height charts are helpful because they quickly narrow the options, but they cannot account for every child’s proportions or riding experience.
Two children who are both six years old may have different leg lengths, trunk proportions, hand sizes, and levels of postural control. A child who is new to cycling may benefit from a lighter bicycle and a lower standover height, while a confident rider may be ready for a larger wheel with more efficient rolling. Weight also matters: a bicycle that is very heavy relative to the child may increase fatigue and make steering, braking, or lifting the bicycle harder.
Use the chart as a screening tool, not as a rule. If height suggests one wheel size but inseam and control suggest another, prioritize safe control and a test ride. It is generally preferable to buy a bicycle that fits now and has useful adjustment range rather than selecting a much larger model “to grow into.”
Approximate bicycle sizes by age and height
The following ranges synthesize commonly published children’s bicycle charts. Measurements are approximate and may differ by brand. Height is given in both feet and inches and approximate centimeters so families can use the system most familiar to them.
- Balance bike, usually 12- to 14-inch wheels: approximately ages 2 to 5, often for children about 86 to 109 cm (2 feet 10 inches to 3 feet 7 inches). The child propels the bicycle with the feet and develops balance and steering before pedals are introduced.
- 12-inch pedal bicycle: approximately ages 2 to 4, often around 86 to 102 cm (2 feet 10 inches to 3 feet 4 inches). This may suit a small preschool child who is ready for pedals, although a balance bike can be a better first step for many beginners.
- 14-inch bicycle: approximately ages 3 to 5, often around 94 to 109 cm (3 feet 1 inch to 3 feet 7 inches). This size can bridge the transition between smaller balance bikes and early pedal bicycles.
- 16-inch bicycle: approximately ages 4 to 6, often around 109 to 122 cm (3 feet 7 inches to 4 feet). It is a common size for preschool and early school-age riders.
- 18-inch bicycle: approximately ages 5 to 7, often around 114 to 130 cm (3 feet 9 inches to 4 feet 3 inches). Availability varies, and some children move directly from 16 to 20 inches.
- 20-inch bicycle: approximately ages 6 to 8, often around 122 to 135 cm (4 feet to 4 feet 5 inches). These bicycles may include more advanced gearing or hand brakes, so control readiness is important.
- 24-inch bicycle: approximately ages 8 to 11, often around 135 to 145 cm (4 feet 5 inches to 4 feet 9 inches). This size commonly serves older children who are not yet proportioned for most adult bicycles.
- 26-inch bicycle: often for children approximately age 10 and older who are around 145 cm (4 feet 9 inches) or taller. Frame geometry, inseam, and the child’s ability to manage adult-style controls must still be checked.
These categories overlap intentionally. A child at the lower or upper boundary should be assessed by actual fit rather than age alone.
Measure height and inseam before shopping
Measure the child without shoes, standing upright against a wall with the feet together. Place a flat book horizontally between the legs with gentle contact at the crotch, then measure from the floor to the top of the book. This approximate inseam is especially useful because bicycle fit depends on leg clearance and the distance needed to reach the ground.
Record the measurement in centimeters or inches and compare it with the manufacturer’s specifications. Do not assume that a 16-inch wheel bicycle from one brand has the same seat height or frame geometry as another brand. Check the minimum and maximum saddle height, standover height, handlebar reach, and total bicycle weight.
For a balance bike, the saddle should usually be low enough that the child can place the feet flat or nearly flat on the ground while sitting. The knees should have a slight flexion rather than being forced straight. For a pedal bicycle, the child needs enough saddle height for efficient pedaling, but the saddle should not be so high that the child cannot regain balance or stop confidently. The appropriate foot position during riding depends on the design and the child’s skill; the key is that the child can control the bicycle without panic or excessive stretching.
Choosing by developmental stage and riding experience
Toddlers and younger preschoolers: A balance bike is often a simple way to practice dynamic balance, weight shifting, steering, and braking with the feet. Choose a lightweight model with a low saddle and rounded, secure grips. Training wheels are not essential for learning to balance and may cause a child to rely on lateral support, although families may use them temporarily according to the child’s preferences and the bicycle design.
Preschool children moving to pedals: Look for a bicycle that allows the child to mount and dismount without climbing awkwardly over a high top tube. Coaster brakes can be intuitive for some children, while hand brakes may be appropriate when the levers are sized and positioned for small hands. The child should be able to squeeze the brakes with controlled force and understand which brake does what.
Early school-age children: At the 16- and 20-inch stages, children may begin riding farther or on varied surfaces. A lighter bicycle with a predictable steering response can be more useful than a feature-heavy model. Gears are not automatically necessary. If gears are included, the child should be able to shift without losing attention to the riding environment.
Older children and preteens: Twenty-four- and 26-inch bicycles can resemble smaller adult bicycles. Evaluate reach, brake-lever fit, frame clearance, and whether the child can start, stop, turn, and look over the shoulder while maintaining control. A professional bicycle shop can help compare youth and adult geometry, especially for a taller child with a short or long inseam.
Perform a hands-on fit check
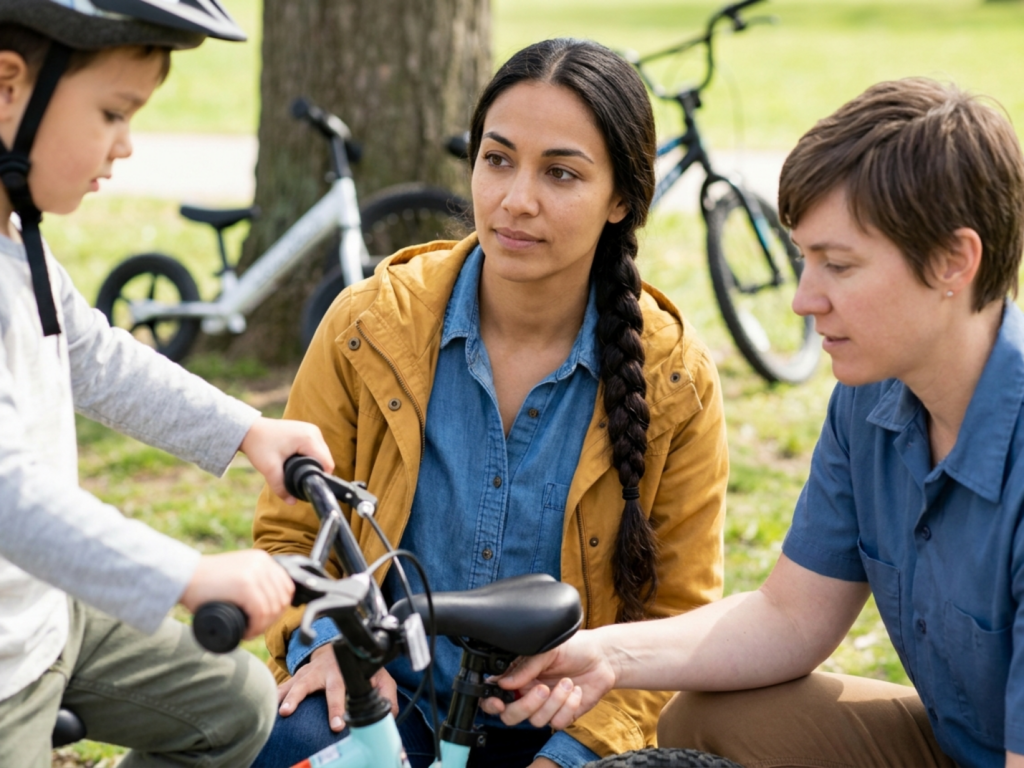
Whenever possible, let the child try the bicycle in a quiet, level area. A correct fit should look controlled rather than precarious. Ask the child to perform several simple tasks: sit on the saddle, squeeze both brakes, turn the handlebars, walk the bicycle, mount, dismount, and stop.
- Check clearance when the child stands over the bicycle. There should be adequate room between the body and the top tube, particularly when the child stops suddenly or dismounts.
- Check reach. The shoulders should remain relaxed, the elbows slightly bent, and the hands able to operate the brakes without sliding forward or stretching.
- Check saddle height. The child should pedal without excessive knee compression or hip rocking. At the same time, the child should have a practical strategy for stopping and putting a foot down.
- Check steering. The handlebars should not feel too wide or far away, and the child should be able to turn without the bicycle feeling difficult to stabilize.
- Check weight. If the child cannot safely lift, walk, or recover the bicycle after a lean, the model may be too heavy even if the dimensions appear suitable.
- Observe fatigue and confidence. Repeatedly wobbling, locking the arms, braking abruptly, or avoiding dismounting may indicate that the bicycle is too large, heavy, or technically demanding.
Make adjustments in small increments and retest. A child does not need to master every feature on the first outing.
Safety equipment and the riding environment
A properly fitted, certified bicycle helmet is essential for every ride. The helmet should sit level, cover the forehead without blocking vision, and have straps forming a secure, comfortable configuration under the chin. Replace a helmet after a significant impact or when it no longer fits according to the manufacturer’s instructions. Families may also find guidance on certified helmets for wheeled sports useful when selecting protective equipment.
Closed-toe shoes with secure soles provide better pedal control than loose footwear. Depending on the setting, consider reflective elements, lights, and clothing that does not hang near the chain or wheels. Gloves are optional, but some children find them comfortable for grip and protection from minor abrasions.
Begin in a traffic-free location such as a smooth driveway, quiet park path, or designated cycling area. Teach starting, stopping, scanning, signaling, and yielding before riding near vehicles. Supervision should match the child’s skills, not only their age. Even a technically well-fitted bicycle is unsafe if the child is riding in an environment beyond their current judgment and attention capacity.
When to seek additional help
Consult a qualified bicycle professional if the child falls between sizes, has unusual proportions, or cannot reach the controls on otherwise suitable models. A shop can measure the bicycle, adjust the saddle and handlebars, and explain brake or gear operation. A local cycling instructor may also help with balance, braking, and road-safety skills.
If riding consistently causes pain, numbness, skin irritation, marked fatigue, recurrent falls, or distress, stop the activity and reassess the bicycle, terrain, and supervision. Do not interpret persistent difficulty as a diagnosis of a developmental or neurologic condition. If you are concerned about coordination, strength, joint symptoms, vision, balance, or a previous injury, discuss those concerns with the child’s pediatrician or another appropriately qualified healthcare professional. They can determine whether an assessment is warranted and can coordinate referral when needed.
Children with physical disabilities, limb differences, neuromuscular conditions, vestibular disorders, or other mobility considerations may benefit from an adaptive cycling evaluation. The best bicycle may involve individualized supports, modified controls, or a different learning pathway; safety and participation should guide the decision.
Safety checks before every ride
- Do not let a child ride a bicycle that is too large to control, even if they are expected to grow into it.
- Inspect the brakes, tires, wheels, chain, pedals, and quick-release or fastening mechanisms regularly.
- Use a properly fitted, certified helmet and replace it after a significant impact.
- Avoid traffic, steep hills, and complex surfaces until the child can stop and steer reliably.
- Stop riding if the child develops pain, numbness, unusual fatigue, repeated falls, or visible distress.
Tools & Assistance
- A wall, book, and tape measure for standing height and inseam measurements
- The bicycle manufacturer’s wheel-size, saddle-height, and inseam chart
- A reputable bicycle shop for sizing, assembly, and brake adjustment
- A certified cycling instructor or supervised skills class
- The child’s pediatrician or a qualified healthcare professional for persistent pain, balance, coordination, or injury concerns
FAQ
Should I choose a bicycle by age or height?
Use age only as a broad starting point. Height, inseam, proportions, riding experience, bicycle weight, and the child’s ability to reach the brakes should determine the final choice.
Is a larger bicycle better because my child will grow?
Not if the child cannot control it now. Excessive reach, high saddle height, or heavy weight can interfere with braking, steering, and safe dismounting. Choose a model with useful adjustment range rather than one that is clearly oversized.
Are training wheels necessary?
No. Many children learn balance through a balance bike or by using a pedal bicycle with appropriate support. Training wheels may be used temporarily, but they are not required for every child.
When is a child ready for hand brakes and gears?
Readiness depends on hand strength, attention, understanding, and practice rather than age alone. The child should be able to operate the controls predictably while continuing to steer and observe the surroundings.
What if my child struggles despite having the recommended size?
Check bicycle weight, saddle and handlebar adjustment, tire pressure, terrain, and supervision. If difficulty persists or there is pain, recurrent falling, or concern about balance or coordination, seek advice from a bicycle professional and discuss relevant concerns with a healthcare professional.
Sources
- REI Expert Advice — The Ultimate Guide to Buying a Kids' Bike
- DICK'S Sporting Goods — Kids Bike Size Chart
- BikeRadar — How to find the right size bike for your child
Disclaimer
This article provides general educational information and is not medical advice, diagnosis, or treatment. Consult a qualified healthcare professional about persistent pain, injury, balance, coordination, or other health concerns.














Please log in to leave a comment.